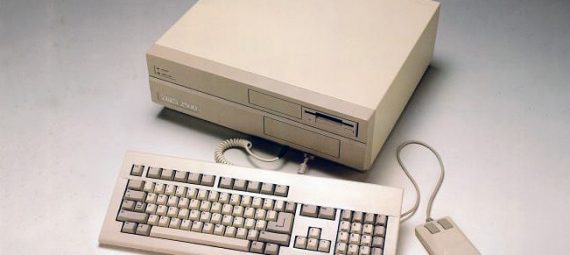
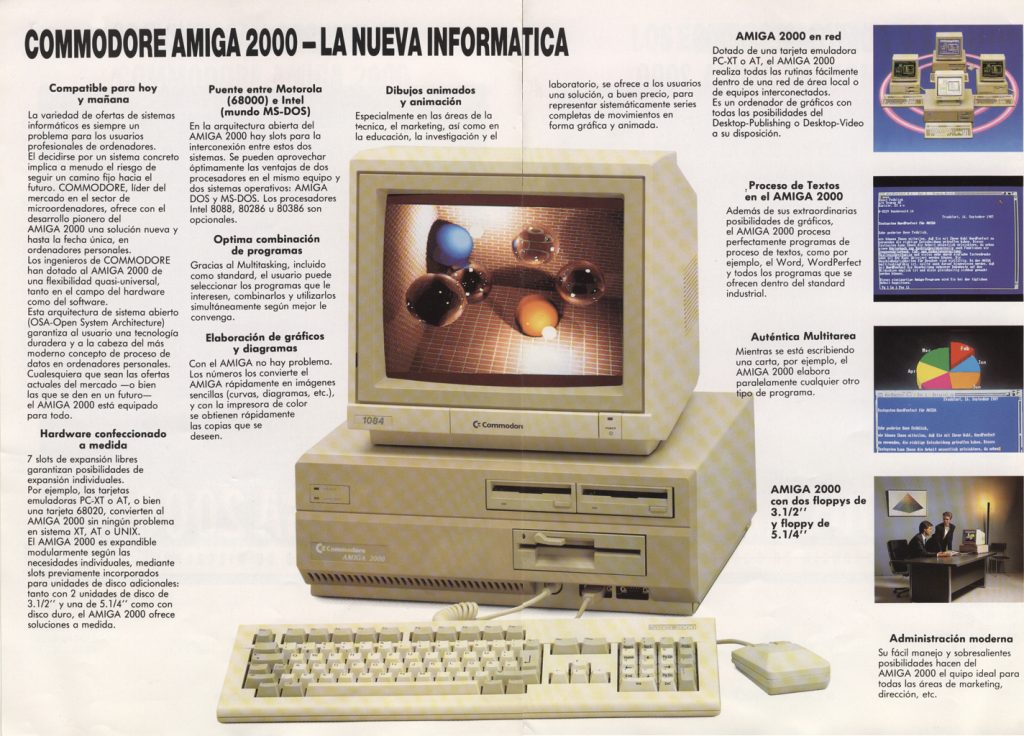
Released 1989: The Amiga 2500, also known as the A2500, was an Amiga 2000 factory installed with a Motorola 68020 or 68030 CPU card with 2 MB or 4 MB 32 bit RAM (Fast RAM). It also came with an SCSI controller and hard drive like the Amiga 2000HD.
Facts
- Type: Personal computer
- Released: 1989
- Operating system: AmigaOS 1.3 – AmigaOS 2.0
- CPU: Motorola 68020@14 MHz, later 68030@25 MHz
- Memory: 3 MB, later 5 MB RAM (2 or 4 MB 32 bit RAM)
- Resolutions: 320×256 up to 736×567i (PAL), later 320×200 up to 1504x576i
- Palette: 4096 colors (4096 on-screen colors in “HAM” mode)
- Manufacturer: Commodore
- Sound: 4 x 8-bit channels, 28 kHz stereo
- Storage: 3.5″ SCSI hard disk
- Removable: 3.5″ DD floppy drive (880 KB)
- ROM 256, later 512 KB Kickstart ROM
- Chipset: OCS, later ECS
- Expansion slots: 5 × Zorro II, ISA slots, CPU slot, video slot
- Predecessor: Amiga 2000/2000HD
- Successor: Amiga 3000
The original Amiga 2000 shipped with just a single floppy drive for storage. This was followed up fairly early by the Amiga 2000HD, which bundled an A2090 hard drive controller and a SCSI hard drive. In 1988, Commodore shipped the Amiga 2500/20, which added the Amiga 2620 CPU card to the CPU slot. It contains a 14.3 MHz Motorola 68020, a 68881 FPU, and a 68851 MMU along with 2 MB of 32-bit RAM (Fast RAM). The A2000’s original 68000 CPU remained installed on the motherboard, but was not used. In 1989, the A2500/20 was replaced by the Amiga 2500/30, which came with the A2630 CPU card, 25 MHz 68030 and the 68882 FPU with up to 4 MB of 32-bit memory.
The accelerator cards, A2620 and A2630, were also available separately as upgrades for the Amiga 2000 or Amiga 2500/HD.
Because the Amiga 2500 has a Motorola 68000 on the motherboard that goes unused, the design is not very cost-effective. A project to replace it with a 68020 on-board began, intending to be a Zorro-II-based (16-bit expansion slots) 68020 machine, but the project eventually became the Amiga 3000 when Dave Haynie sought to include his new Zorro-III bus (32-bit expansion slots).
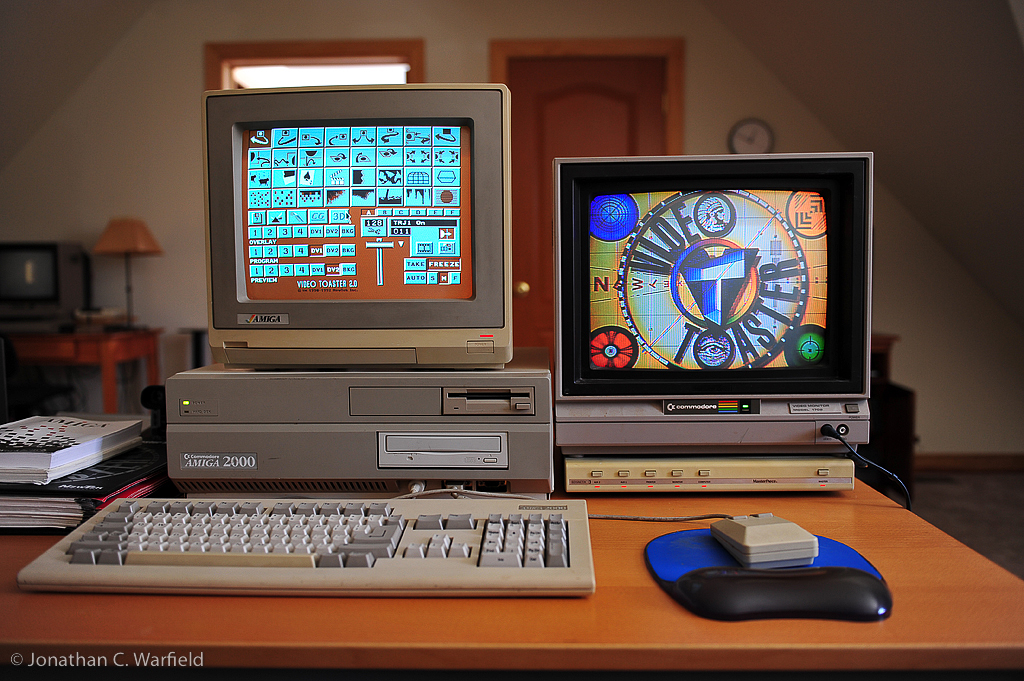
The A2500 remained in production after the release of the Amiga 3000, maybe because the original NewTek’s Video Toaster (video broadcast and editing hardware) will not fit in an unmodified Amiga 3000 case. According to ex. Commodore employees, they still sold big numbers of Amiga 2500 after the release of the Amiga 3000, customers seemed to like the bigger housing of the A2500. Until the release of the Video Toaster 4000, the Amiga 2500 was the fastest computer available for use with the Video Toaster.
A variant of the Amiga 2500 called the Amiga 2500UX was also available, which was supplied with Commodore Amiga UNIX (Amix) and tape drive.
My Amiga 2500
After unpacking, I hooked it up and turned it on immediately, no patient to check it inside. The power supply “protection circuit” would switch it off at once. Opened it and found that the hard drive controller card had loosened a bit after transportation. Now, the power stayed on, but the power lamp was just blinking and no boot. Then I decided to remove the drive cluster and power supply in order to re-seated all the chips in their sockets. SUCCESS, the machine booted from the hard drive into Workbench 3.1.
The Amiga 2500 missed the 68030 CPU card that it had originally. At least it had an hard drive, additional Fast RAM (CPU RAM) and CD-ROM though. An GVP SCSI controller with 8 MB additional RAM along with an 18 GB SCSI Ultra disk that got an SCSI Ultra – SCSI adapter. It also had the latest Kickstart ROM 3.1 and 1 MB onboard Chip RAM (1 MB Chip RAM is standard in later revisions).
Upgrades and repairs
- CPU upgrade: Traded some games and hardware for an GVP 030@25 MHz CPU/accelerator card. This card also got an SCSI controller with DMA to its on-board 32 bit Fast RAM. So removed the other hard drive controller and connected this one to the hard drive and CD-ROM.
- RTC battery: Soldered in a new RTC battery (clock battery). The original battery was already removed from previous owner to avoid leaking and damage to the main board.
- Adding more 32 bit RAM: Got hold of 3 x 4 MB 32 bit “GVP SIMM” RAM for the CPU card, the card already got 1 MB soldered on so this gives 13 MB Fast RAM in total. Unfortunately one of the sockets got a cracked release level, but I still manage to hold the RAM in place by sticking something in between the modules.
- Upgrade to ECS: Upgraded with ECS Denise chip (graphic chip). Now the “new” graphic modes in “31 kHz VGA” are available, but restricted to 4 colors of a palette of 64 colors only, due to bandwidth capacity. Still works great when running the original 4 color icon set in Amiga OS 3.1.
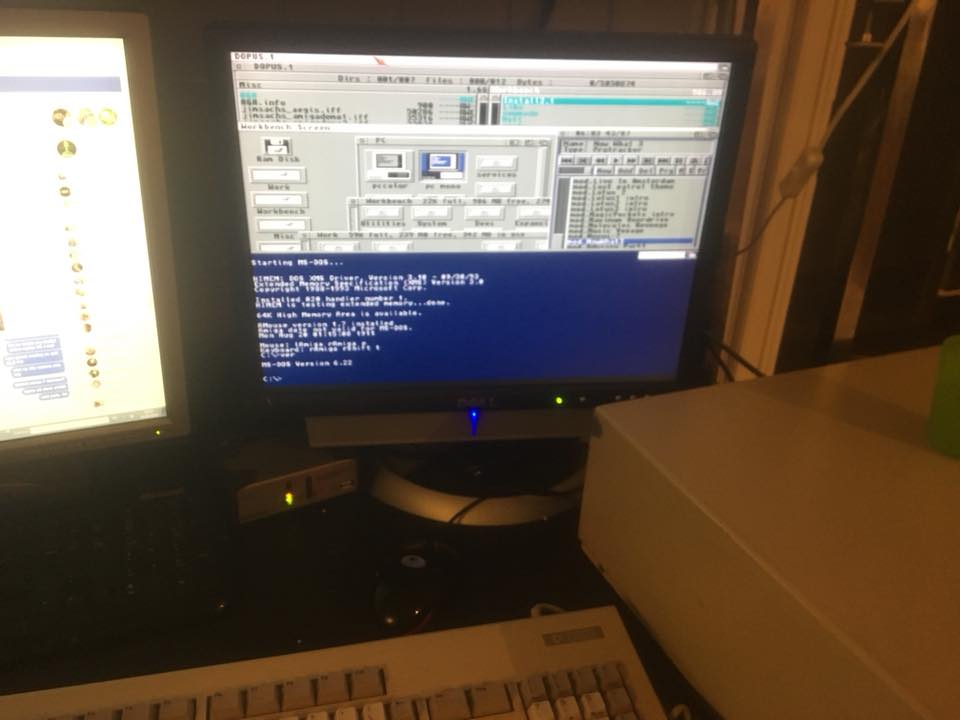
- PC emulator bridgeboard: Installed the A2286AT PC emulator card together with an VGA ISA card and a Sound Blaster 2.0 ISA card.
- Adding FPU: Installed a an 50 MHz 68882 FPU (math co-processor) on the CPU card, with a separate oscillator to make it run at 50 MHz while the CPU still runs at 25 MHz.
- Adding a combo 3.5″ and 5.25″ FFD: Installed a combo 3.5″ and 5.25″ HD floppy drive for the A2286 PC emulator in place of the CD ROM drive. The CD ROM drive didn’t matched the “time typical” look I want my A2500 to have, as virtually no one had a CD ROM drive installed in their Amiga in the late 80’s, CD ROM was not normal before the 90’s.
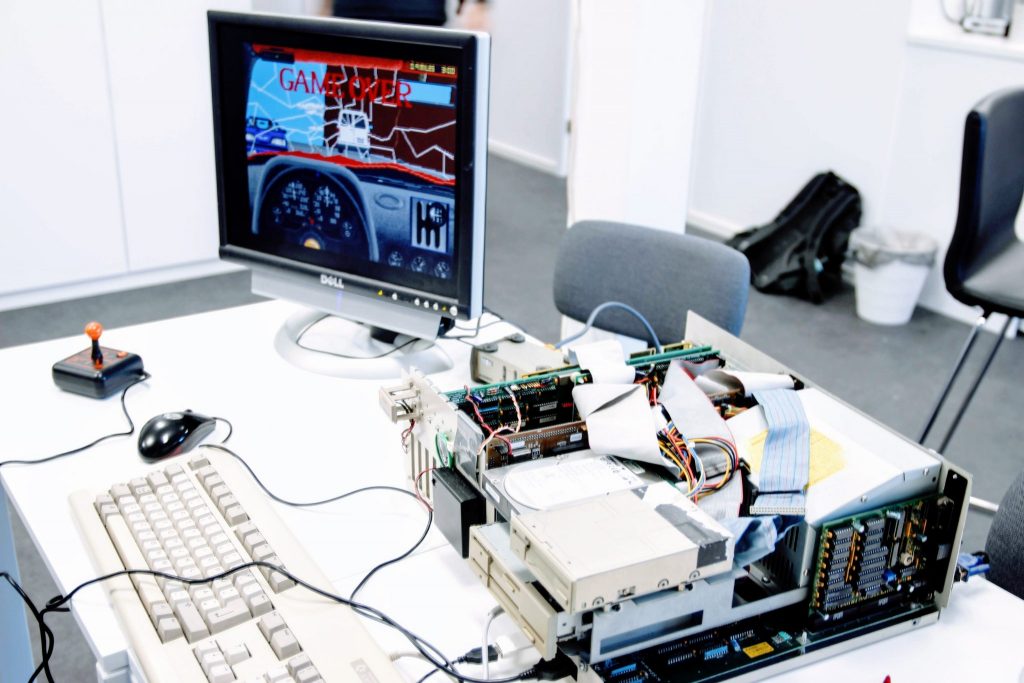
My Amiga 2500 without cover. - Adding a SCSI2SD: Installed a “SCSI2SD” memory card reader to use a SD memory card as hard drive. Cut and drilled a spare expansion slot back plate to mount the SCSI2SD card onto in order to have easy access to the micro SD card from the rear.
- Adding hard drive for PC emulator: Separate hard drive for the PC emulator: The A2286 PC emulator got a really slow hard drive seek time when using an image file on an Amiga partition. This is not very noticeable when using DOS games, but a disk intensive program like Windows 3.1 gets almost completely useless because of the slowness.After some experiencing and try outs, I’ve managed to setup an I/O card with IDE hard drive interface for the A2286 card. I’ve installed a CF memory card for hard drive. The CF card adapter is installed in one of the rear slots for easy access. I’ve used BIOS boot overlay program “Ontrack” for supporting bigger hard drives than the limited sizes supported in the BIOS setup on the A2286 card.
- Convert ISA-8 slots into ISA-16 (16 bit): An Amiga 2000/2500 got 4 ISA card slots, however only two of them got the extra connector that makes them ISA-16 bit/extended. The VGA graphic card and the A2286 card already used the two ISA-16 slots, and the I/O card also need an ISA-16 slot. Luckily, the Amiga main board supports all 4 ISA slots being 16 bit, the two ISA-8 slots only misses the connectors itself to be soldered in. I’ve soldered in the two “missing” connectors and now turned all 4 ISA slots into 16 bit.
- Adding a VA2000 graphic card: Got myself a second hand VA2000 RTG graphic card with the CX2000 flicker fixer for a very reasonable price. Worked out great after installation. Running Picasso 96 RTG system.

Hardware failure and replacement upgrades
- Adding a TF536 accelerator: My GVP 68030 accelerator got unstable and froze the machine up from time to tome. Was unable to fix it. Replaced the old card with a Terrible Fire 536 card, which is a new “low cost” 68030@50 MHz accelerator with 64 MB Fast RAM and IDE controller. Replaced the RTC battery with a coin cell battery holder and a diode to prevent battery CR3032 from charging. I had to replace the battery in order to physically fit the new accelerator card as it sits in the 68000 CPU socket directly. The IDE controller was unstable on my system, but I was able to use a GVP SCSI Zorro II controller i had for the existing SCSI to SD setup.
- TF536 – upgrade firmware: I was able to program the TF536 with new firmware. I used a Raspberry Pi to program it, and soldered the necessary wires directly to the TF536, on the Raspberry side I used a connector from a SCSI cable to connect to the pins. Programming went successfully and the IDE controller is now stable. I’ve setup a IDE-SD adapter to use a SD card as hard drive, and modified a slot back plate to hold the SD-IDE adapter. In that way I can easy access the SD card from the rear of the machine.
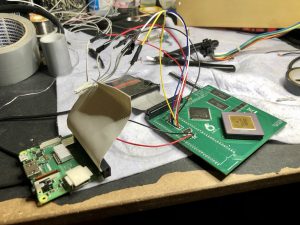
Programming TF536 using a Raspberry Pi - A2286AT bridgeboard: My A2286 card stopped working completely, I suspect maybe failed EPROM chips with BIOS and firmware, because computer can still recognize the card. I bough a new A2286 card from a guy in Sweden, the new card worked after some re-seating of chips and some fiddling. I’ve also replaced all the electrolytic capacitors on the board.


hi
I’ve got an Amiga 2500/30 with a bunch of addon cards inside. Last I turned it on was like 8 years ago, it worked back then. I had it hooked up to a Samsung Syncmaster 17″ monitor. Now I wanna sell it, do you have any idea what I can ask on ebay for it (average)? Also, do you know if I can test it with an LCD Flatscreen monitor if it still works? I just moved to a new flat, so my place is a bit of a mess, and I wanna sell it because frankly I need money and I can use an emulator anyway if I wanna indulge in nostalgia.
Hi! The value depends a bit on what cards you got, the condition of the machine and where you live. If you don’t have a scan doubler/flicker fixer card installed in the video slot, most LCD flat screens want work because they can’t handle Amiga’s 15 KHz signal using the VGA port. If you got a flat screen TV on the other hand, you can test the computer using the video composite signal from the yellow RCA connector on your A2500 instead of the Amiga 23 pin RGB connector.
Be aware the Amiga 2000/2500 got a battery on the motherboard for real time clock. These usually starts to leak and can make serious damages to the motherboard. So you should open the lid and remove the battery by cutting it off very carefully. Also clean with alcohol if needed.
Back to prices: the A2630 card usually change hands for around 100-150 Euro. The A2500/A2000 itself is unfortunately not the most sought after model, but valued a bit higher than the A500 and A600, but not close to an A1200. Without any extras and if its tested and working and looking OK, I would consider 150 Euro a fair price.
Add-on card can be sought after, like graphic and network cards, depends on the specific cards.
You can get higher prices than I suggested, using eBay etc. But these are prices I consider “fair” and normal in the “community”.
I could be interested in both the A2630 card for myself, depending on price and condition.
got a fully working C64 with 6581 as well. what’s that worth now? 🙂
i need more room, got too much old stuff here.
The A6581 is the SID sound chip always present inside the Commodore 64. Are you meaning the 1541 disk drive or something else? A C64 in working state sells for around 70 Euro. If you got the original box, manuals and everything that came with it and it looks really good without to much yellowing, it sells for around 100 Euro.
Hi, I’ve got an A2000 with A2286 and have upgraded the ISA slots, running a VGA card, Sounndblaster and IDE controller. I’m trying to use Ontrack to ‘see’ a CF card as a HDD (through an IDE>CF adaptor) but it can’t see it. Same result using EZ-Drive as well. I suspect the HDD type may be incorrectly set in the BIOS. Can you tell me what settings you used in the BIOS to get the CF card functioning as a HDD using Ontrack, and anything else that might help me to get mine working? For interest, I run both the Amiga and VGA card connectors into a VGA switch, which is then connected to a Commodore 1940 (bi-sync) CRT monitor. Very nice setup…except for that A2286 HDD business 🙂
I don’t think which harddisk you set in BIOS really matters much when using Ontrack. Unfortunately my A2286 card has just failed, and I can’t fix it, so I can’t check my settings. I’m lokoking for another A2286 card to purchase.
I don’t think the BIOS setting is the problem, I think the IDE controller is not happy with the CF-card adapter. It’s very normal. I find SD-card adapters much more compatible. You should try with a SD-card adapter instead.
Very cool you got an automatic switch box. Good luck with your HDD.
Maybe it´s a little bit late, but the A2286 could have failed due to an empty RTC/BIOS-Setting-Battery. On the Daughteboard sits a DALLAS 1287 (or so)witch contains the RTC, same RAM and a battery to hold the RAM/BIOS entries. If the battery is empty the A2286 won´t start anymore correctly. Some older 286 behave the same, Commodore PC II as example.
You can change it (DALLAS 12887 is the keyword) or do some DIY to connect a new Coin-Battery to the Chip inside. Some soldering and drilling Abilities are useful 🙂
Thanks for replay. No, the A2286 will still work without any battery so this is not the problem, only CMOS settings will not be stored. On this version of the A2286, there is an external battery, not a Dallas chip. Some A2286 revisions got the Dallas chip, but not mine. I’ve connected coin cells batteries to Dallas chips before, like in my Commodore PC40-III.